Recipes
Focaccia

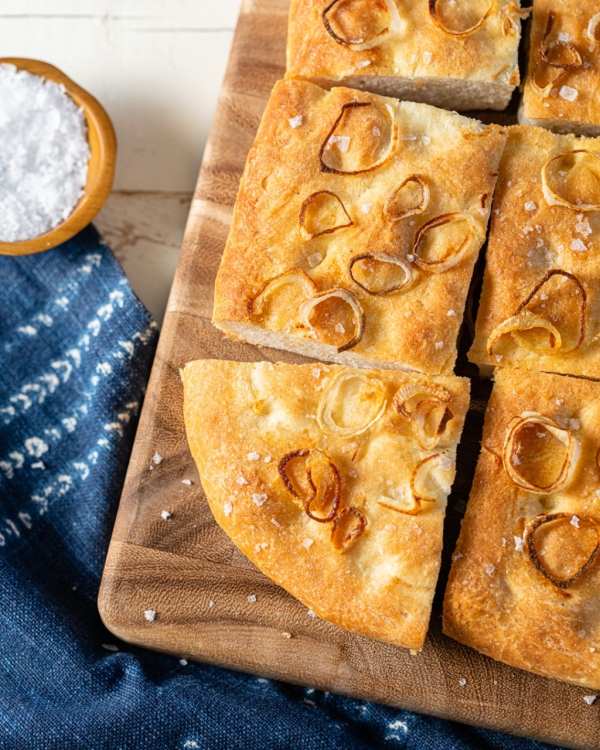
Bringing flowers is fine. Arriving with an extra bag of ice is perfectly okay. But showing up at your BFF’s small, socially distant dinner with an fresh-from-the-oven Italian focaccia topped with crispy, salty shallots that you made yourself, warm from the oven — that’s the kind of behavior that gets you invited back next time.
If you’ve always wanted to bake bread but haven’t gotten around to it yet, this is the perfect recipe to get you started. You don’t need any fancy mixers or special equipment — just your own two hands and some patience while you wait for the dough to rise. (YouTube videos are a perfectly acceptable way to pass the time, but you can also get some emails answered or laundry folded.)
The finished product will look so beautiful that even you might start to think it’s from a bakery. In our test kitchen, one going-for-seconds taster rhapsodized, “I would serve this at a wine and cheese night, or a Sunday spaghetti supper with a big bowl of pasta and a hearty pour of a fat red wine.”
Toss any leftovers into the freezer on baking day and you’ll be set with an emergency weeknight meal. Just wrap the bread in foil and put it in a 350° oven until it’s warm. Heat up some pizza sauce, and you’ve got your own version of classic Italian dunkers.
Our tip: Try a make-ahead option by preparing the dough the night before, then take it out of the fridge and bake it the next day. Doing it this way makes even weeknight fresh bread a wonderful possibility.
Servings: 6 to 10
Ingredients
1 packet instant dry yeast (2 ¼ tsp)
2 tsp honey
2 Tbsp olive oil, plus more for greasing the bowl and pan
2 cups warm water
5 cups bread flour, plus more for dusting work surface
1 tsp kosher salt
4 shallots, thinly sliced into rings
Flake salt, for garnish
Directions
-
Add the yeast, honey, olive oil, and water to a large bowl, and whisk to combine.
-
Add the flour and, using a wooden spoon, mix to casually blend (it will be a craggy mess).
-
Add the kosher salt and continue to mix until the dough goes from craggy to kind-of-wet and shaggy. Cover the bowl tightly with plastic wrap and let it sit in a warm spot until double in size, about an hour or so.
-
Turn the dough out onto a lightly floured surface and knead it: Using the palm of one hand, press into the dough, turning and folding it onto itself a few times. The dough will be sticky but manageable until it comes together and starts looking smooth and elastic, about 1 minute. Feel free to dust with flour occasionally but not too much.
-
Drizzle a bit of olive oil into the bowl to grease it up and put the dough back into it. Cover the bowl tightly with plastic wrap and let it sit in a warm spot until it doubles in size again, another 45 to 60 minutes.
-
Pour enough olive oil onto a rimmed baking sheet (approximately 12 ¾ x 17 ¾ inches) to generously coat the entire sheet. Using your hands, spread it all around.
-
Turn the dough onto the baking sheet and, using your hands, gently press the dough into a flat, even layer. It doesn’t need to stretch to the exact size of the sheet pan because it’ll puff up and fill in as it proofs and bakes.
-
Drizzle the top of the dough with lots more olive oil and lightly drape a piece of plastic wrap over it. Let the dough rest in a warm place for another 45 to 60 minutes.
-
Preheat the oven to 425°.
-
When the dough is ready to bake, it should look light, puffy, and buoyant. To test this, use your fingertips to press the dough lightly. It should bounce back ever so slightly.
-
Using the tips of your fingers, lightly dimple the surface, and scatter the shallot rings over the top. Drizzle with more olive oil and sprinkle with lots of flake salt.
-
Bake, rotating if needed to avoid hot spots, until the bread is deeply golden brown and the shallot rings are caramelized and cooked through, 35 to 45 minutes.
-
Remove the pan from the oven and let the focaccia cool slightly before slicing and serving.
-
The dough can be made 1 day ahead; wrap tightly after step 5 and refrigerate until ready to use.
Recipe adapted from: “Nothing Fancy” cookbook